To those who haven’t used Facebook Ads Manager, it can be a little overwhelming knowing where to begin. Here’s eight steps to create an ad in Facebook Ads Manager.
Step 1: Getting started
In Facebook, select the drop-down arrow in the upper-right corner and choose “Manage Ads”. Select your account in Business Manager, then select the “Campaigns” tab and click the big green “Create” button.
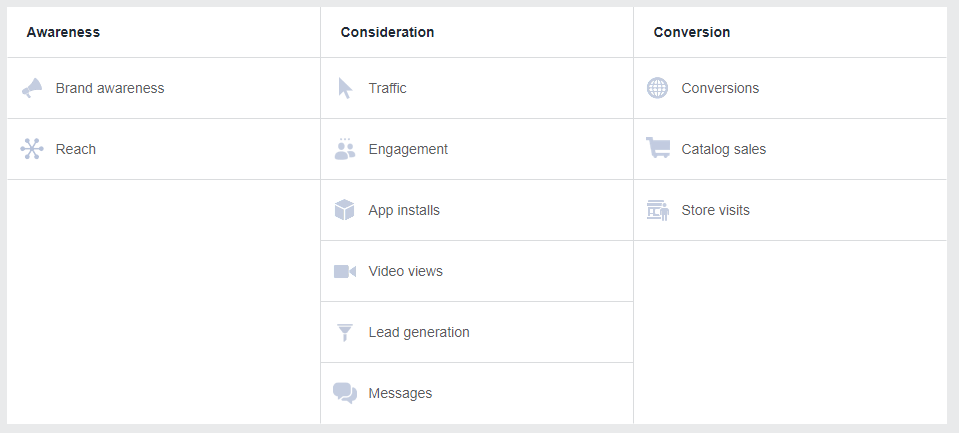
 Step 2: Choose your objective
You need to choose an objective for your ad and you need to get it right.
- Do you want to get it in front of as many people as possible – choose Reach.
- Do you want to get as many people liking and commenting as possible – choose Engagement.
- Is it imperative that people visit your bricks and mortar location – choose Store visits.
For more tips on choosing the right objective for your ad, click here.
Step 3: Enter your campaign name and ad set name
Choose specific names that are easily identifiable. This will make it easier for you when it comes to reporting, as you’ll be able to tell which ad is which. For example, your campaign name may be “Cooking, Sydney – Lead Generation” and your ad set name could be “18-35 Males”.
Step 4: Choose your audience
Facebook Ads Manager allows you to really narrow down who will see your ad. You can choose an audience based on their location, age, gender, language, behaviours, demographic and interests. You’re also able to exclude certain audiences from seeing your ad using the same categories.
As you select your audience, Facebook Ads Manager will gauge how specific or broad your audience is. While your audience size will depend on your campaign, you should be sitting somewhere in the middle of this gauge.
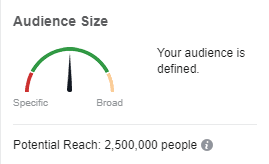
For a comprehensive guide to choosing an audience, click here.
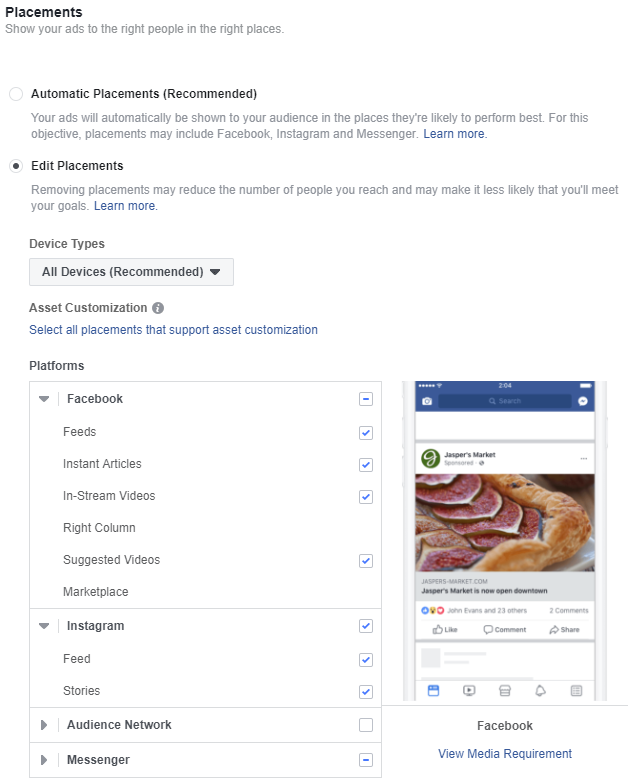
Step 5: Select your ad placements
While Facebook will want to choose these placements for you, it’s important that you opt for the “Edit Placements” option. If you do go for the “Automatic Placements”, Facebook could send your ad anywhere, including third party apps that won’t use the detailed audience targets that you’ve just spent lots of time setting up.
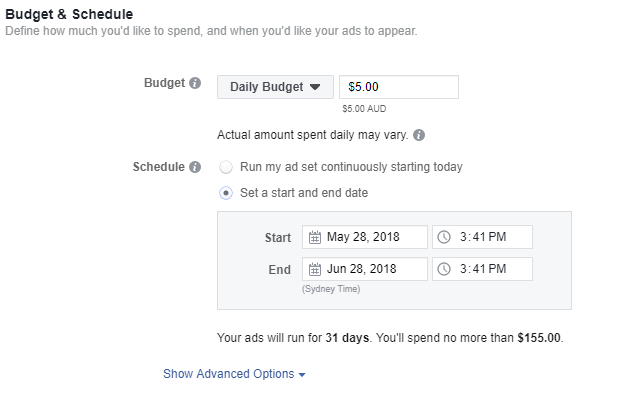
Step 6: Select your budget and schedule
Here, you can choose whether you’d like to set a daily or lifetime budget. A daily budget will spend a certain amount of money each day, whereas a lifetime budget runs throughout the entire campaign.
We’d recommend setting a larger daily budget for your first day or two and then lowering it over the course of your campaign. This will help to maximise your moolah.
Step 7: Create your ad(s)
It’s now time to create your ad(s). At this stage, you can select a format (e.g. carousel, single video, etc.) and add:
- Images and videos
- Text
- Website URL
- Display link
- Headline
- News feed link description
- Call to action
Top tip: videos work really well in Facebook feeds.
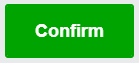
Step 8: Review and finalise
Before completing your ad, preview it to make sure everything looks ok on mobile and desktop. Once you’re happy with everything, select “Confirm” to send your ad live.
That’s it! You’re done. Give yourself a pat on the back.